Switchboard bulk messaging
Switchboard bulk messaging allows users to communicate time-sensitive information to multiple patients on the schedule at once.
To use this feature, you must agree to identify patients accurately and utilize the feature only to send messages that are time-sensitive, non-personal in nature, and consistent with Penn Medicine bulk messaging approved workflows. The use of this feature will be monitored periodically.
Examples of approved bulk messaging include:
- Alerting patients of an office/clinic closure or weather event
- Malfunctioning equipment like a CT scanner
Bulk messaging should not be used for ongoing appointment-related reminders, copayment collection, and other messaging that is already sent by Penn Medicine automatically.
Workflow:
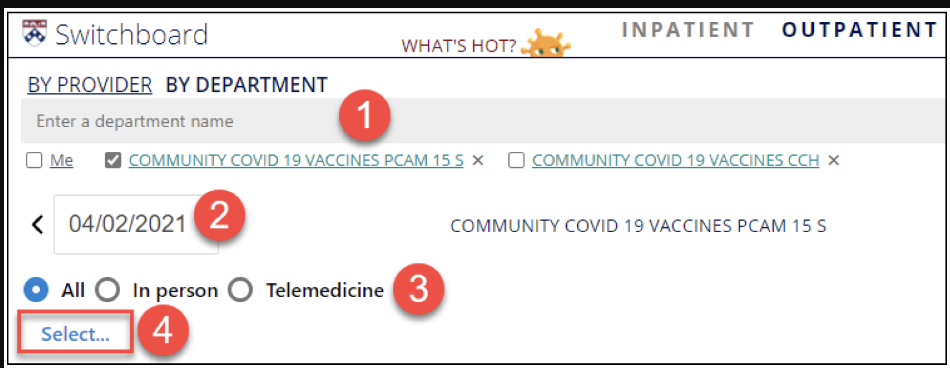
1. Once in outpatient Switchboard, select the appropriate provider or department.
2. Select the date.
3. Select the appropriate filter: all, in-person, or telemedicine visits.
4. Click "Select...".
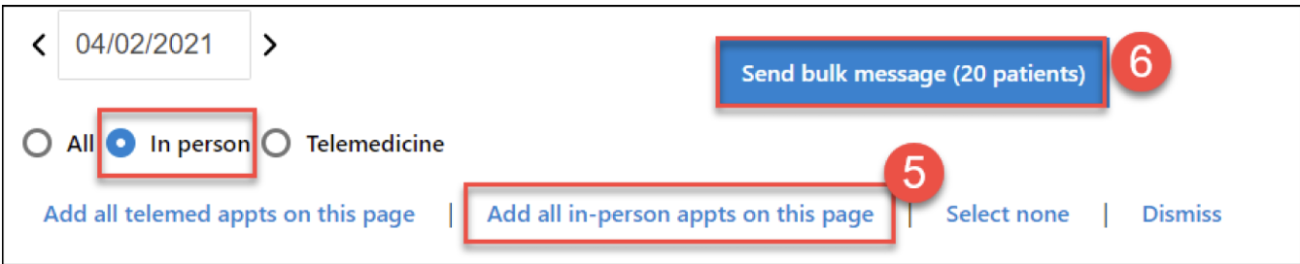
5. Select the appropriate option: Add all telemed appts on this page / Add all in-person appts on this page.
6. Select "Send bulk message (20 patients)" button.
Options before clicking continue:
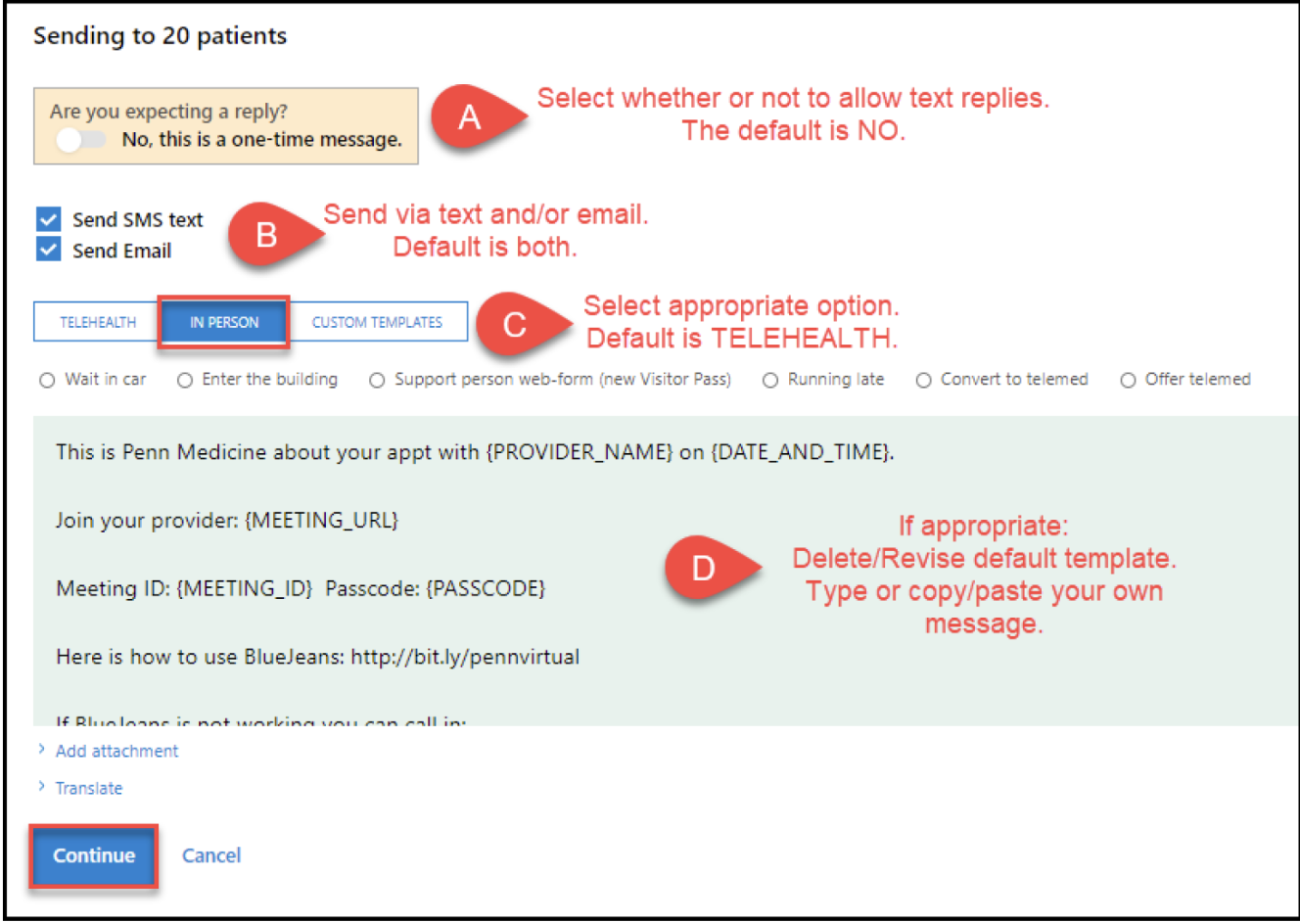
7. Verify the above options, then select "Continue".
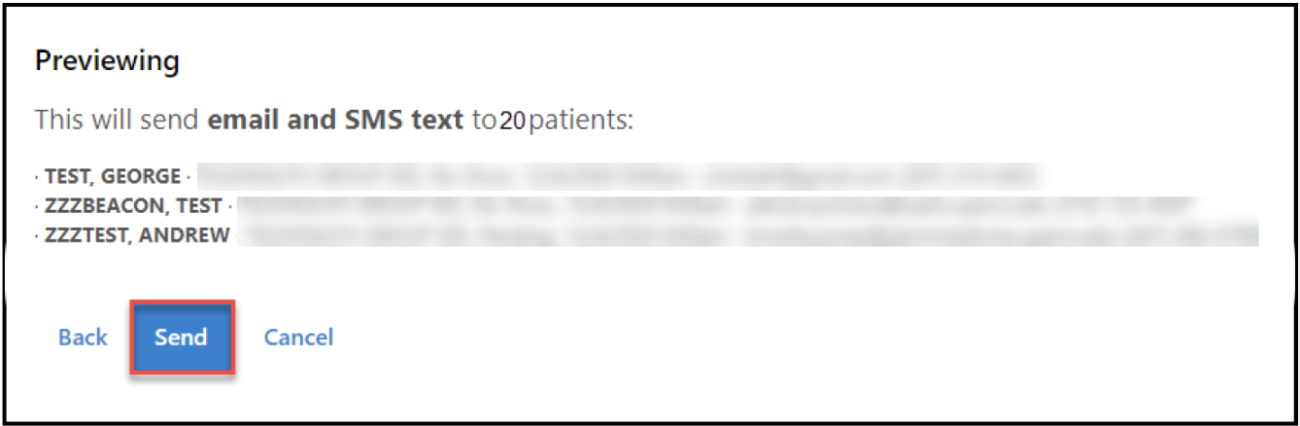
8. Select "Send".
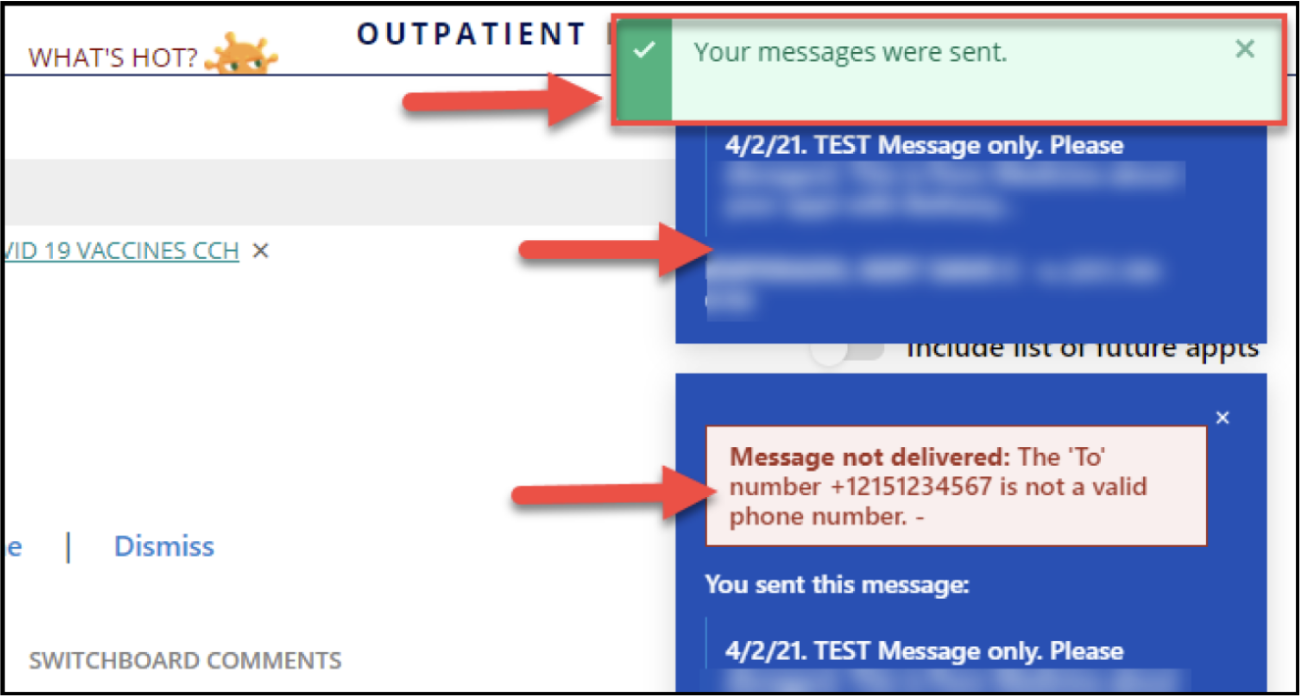
Verification that messages were sent (or not) is delivered in upper-right hand corner of Switchboard.
9. Repeat steps 4-8 for each additional page of patients.
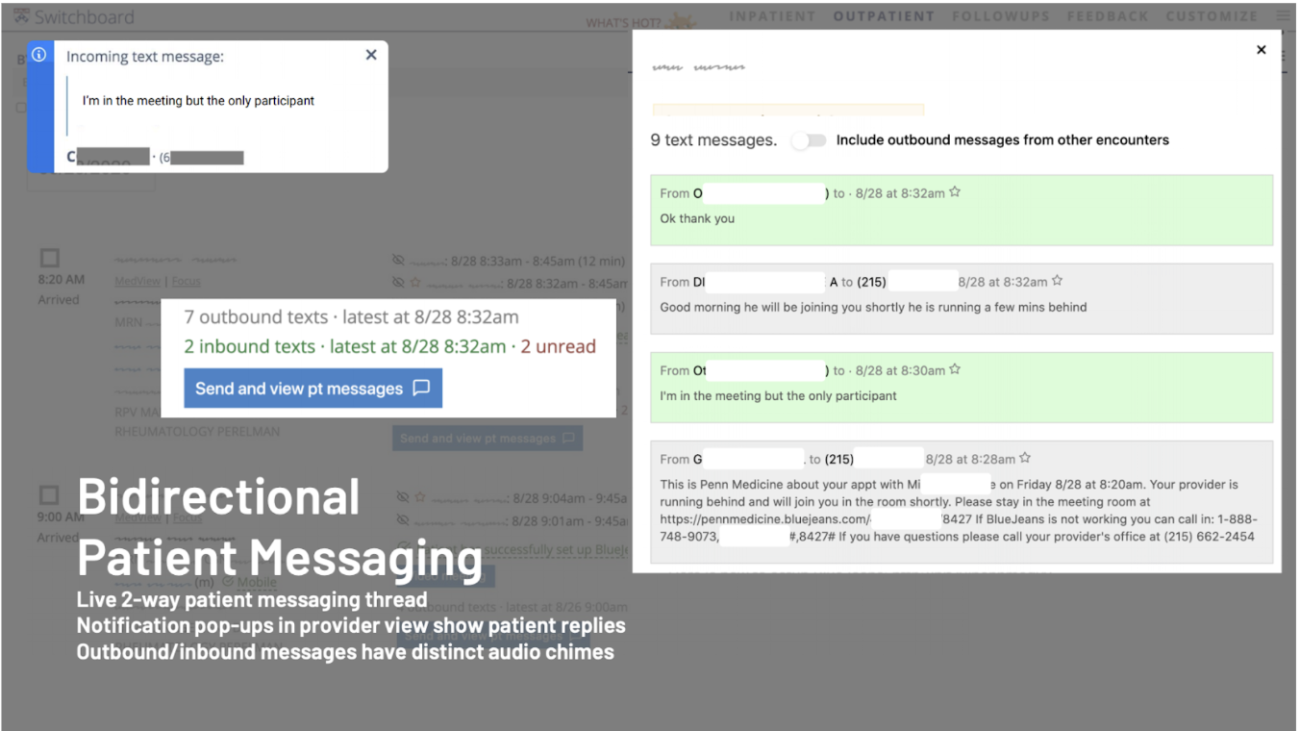
Real-time messaging with individual patients
Conversations with all patients:
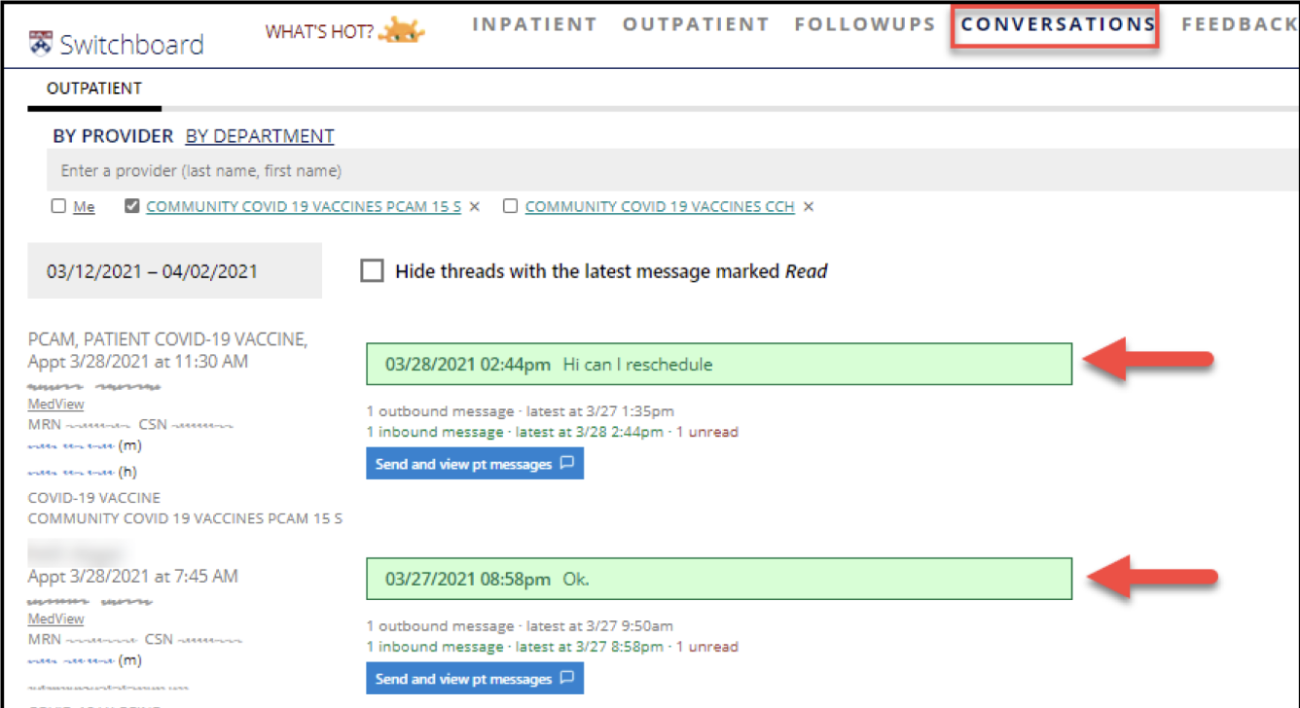
To view all messages with patient responses, select the "CONVERSATIONS" tab on the main Switchboard toolbar.
Conversation with one patient:
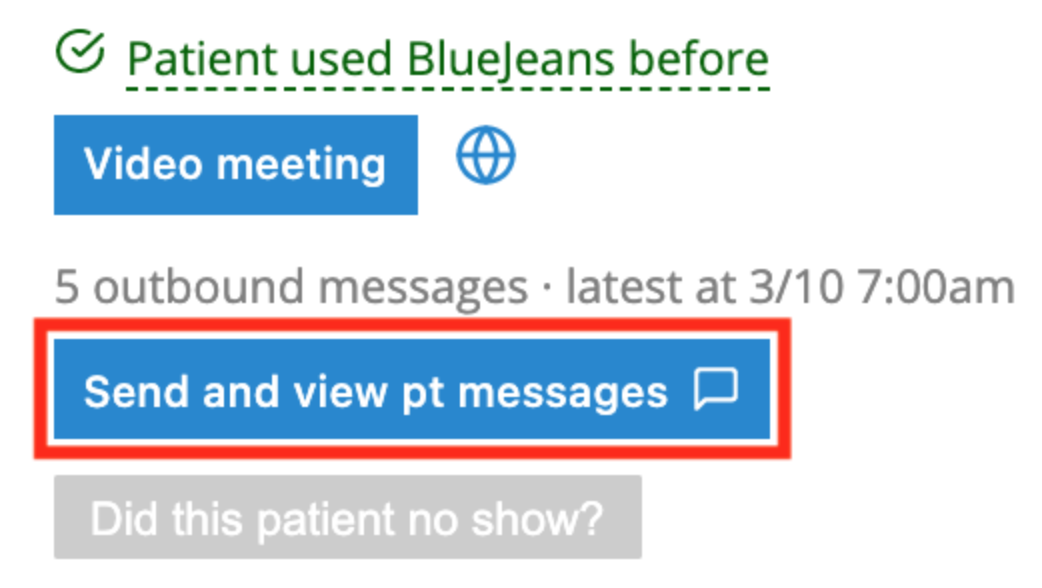
1. To view the message log for an individual appointment, select the "Send and view pt messages" button. Inbound messages are highlighted in green.

2. A messaging pop-up window will appear.
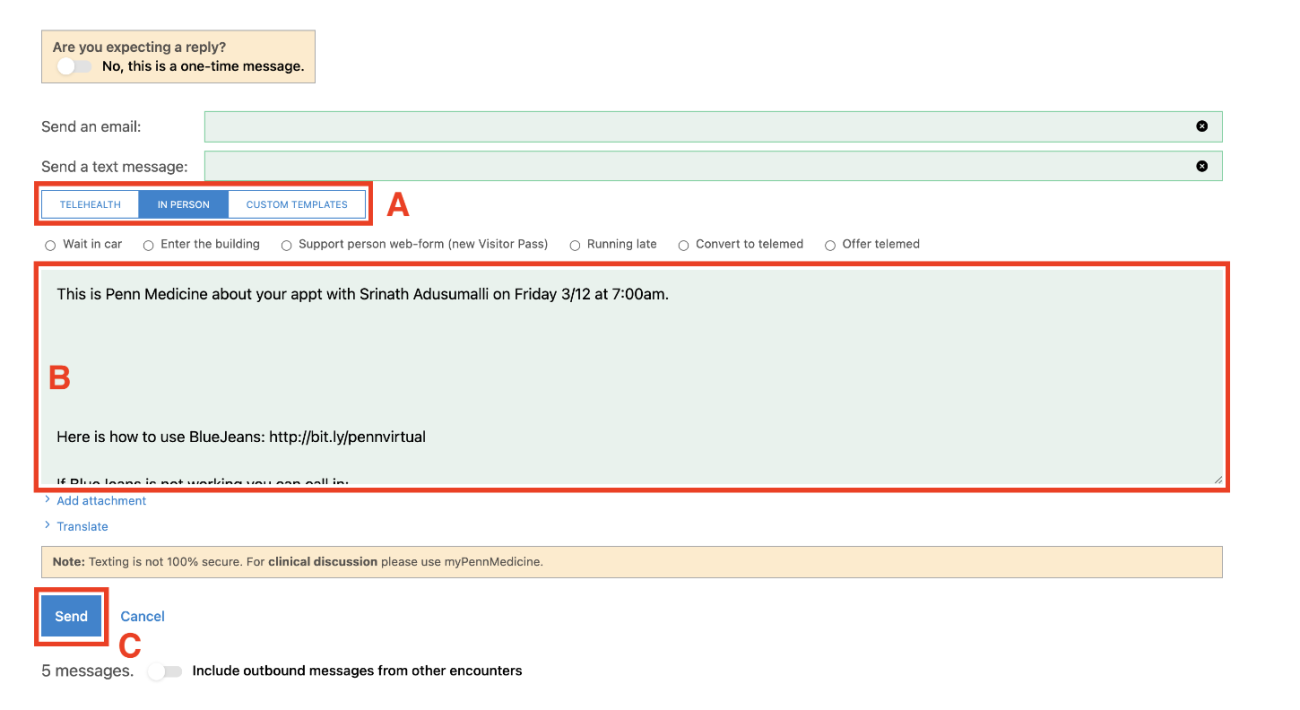
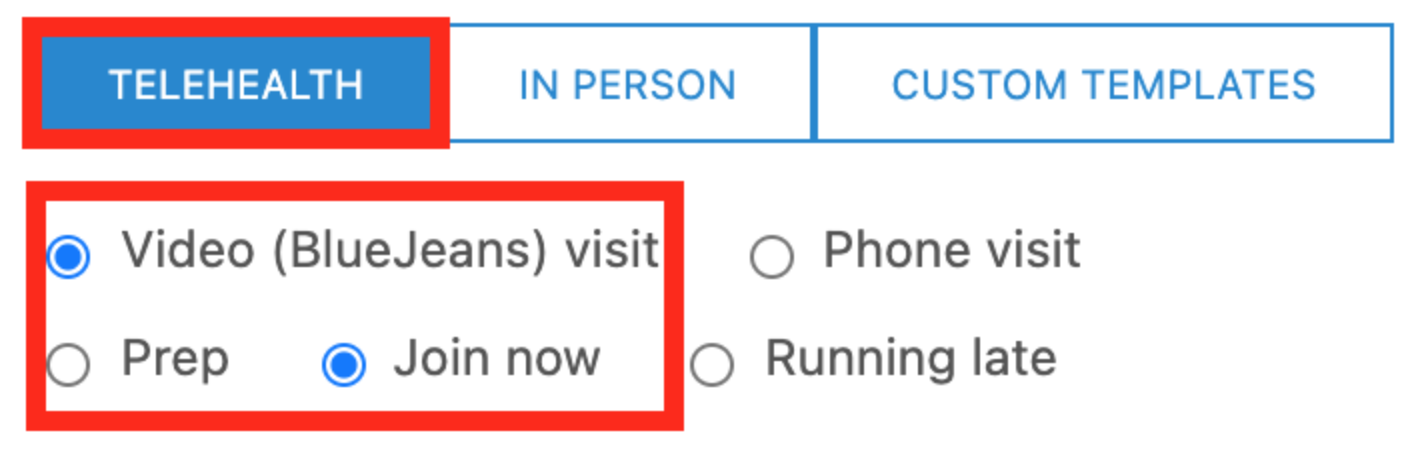
- A. Choose from customized text templates for "Telehealth", "In-Person", or "Custom Templates" by selecting template buttons
- B. Click in the text field to adjust templates or add text
- C. Select "Send to patient"
3. Message translation is available.

4. Patients can respond to texts sent from Switchboard. To enable this feature, select the "Are you expecting a reply?" toggle.

Best practices:
Switchboard pulls patient mobile numbers from PennChart. Please confirm this number is correct before sending patients text messages.
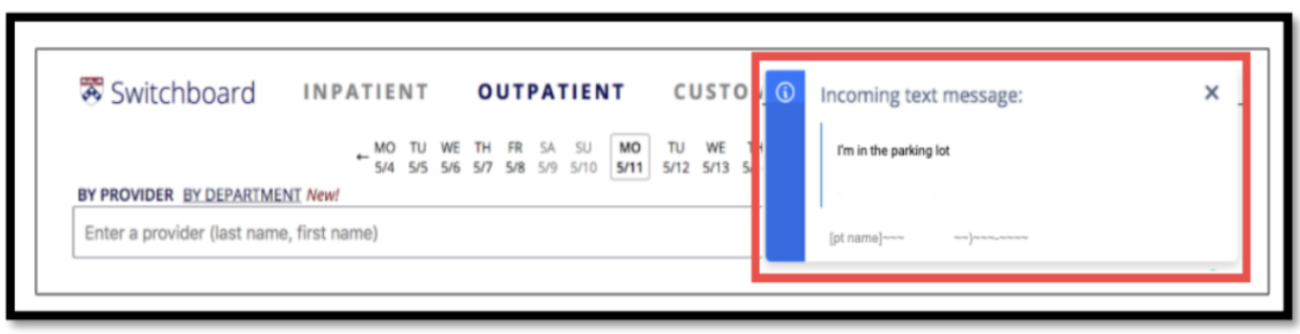
By keeping Switchboard active on the computer, an audible notification and pop-up window will appear if a patient responds to a text.
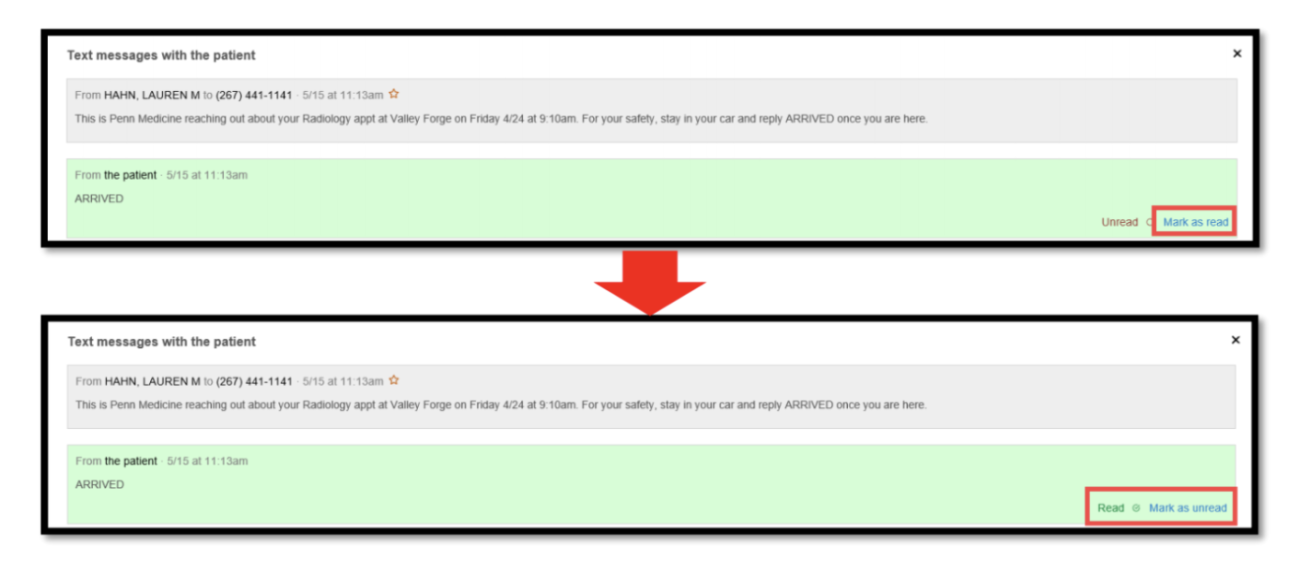
To keep track of messages that have been read, select "Mark as read". This will not occur automatically.
Calling patients through a masked number
The Dialer function of the Doximity application allows you to call a patient from your own mobile phone but masks your personal number in caller ID and replaces it with a phone number chosen by you. When combined with the Haiku app, you can open a patient chart in Haiku and pass the patient's phone number in the chart through to Doximity with one tap.
New Doximity Users: To get started, register for a Doximity account with your Penn Medicine email address. Once your account has been created, Doximity will send a verification email to your Penn Medicine email.
Existing Doximity Users: If you have an existing Doximity account under your Penn Medicine email, you should already have access to Dialer. If your existing Doximity account is under a different email address, just add your Penn Medicine email as a secondary email address to receive access. You can add a secondary email by following the steps below:
- Go to Doximity settings
- Under ‘Sign-in Emails’, click on the blue 'Add an email address'
- Enter your Penn Medicine email and current Doximity password and click ‘Add’
- An email will be sent to your Penn Medicine email with instructions on how to confirm the change.
Instructions for pairing Doximity with Haiku:
- Make sure you have Haiku installed on your iOS-based device. If you do not have it installed, go to your iOS camera and point it at the “Get It” QR code below and a banner should appear (tap it) with a link to Haiku installation. Once Haiku is installed, point your iOS camera to the “Set It” QR code below and a banner should appear (tap it) which will automatically set up Haiku for Penn Medicine settings.

-
Of note, if you did not originally set up Haiku through this method, it is highly recommended you delete the current app and reinstall the app via this method. It will enable the latest settings such as persistence of Touch ID/Face ID based login for 30 days.
-
Register for Doximity and view Dialer set-up instructions on the Dialer Enterprise Resources page.
-
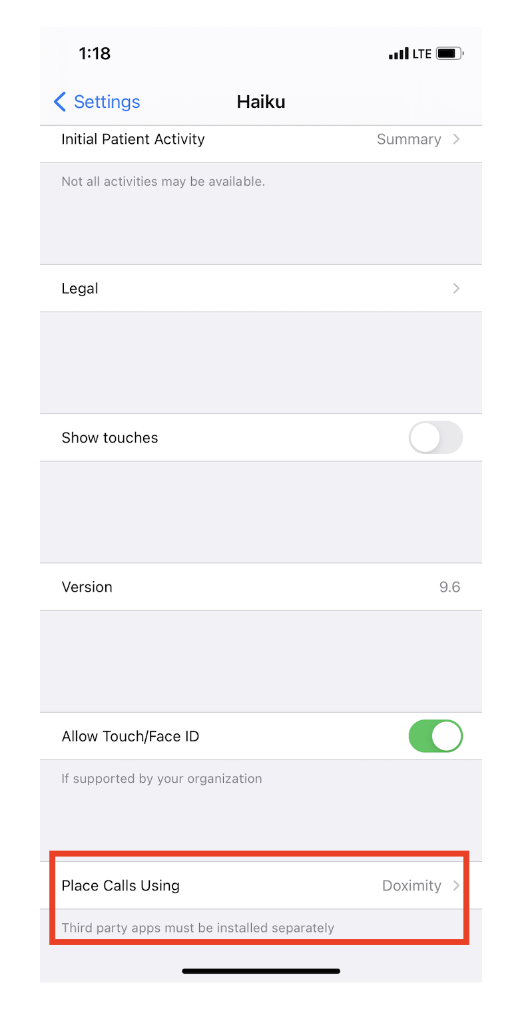
To link Doximity to Haiku, go to the Settings app on your phone and swipe to the bottom of the list of settings to app-specific settings. Find the Haiku app and tap on its name. Swipe to the bottom of the page that appears and change “Place calls using” from “Phone” to “Doximity”. You will now be able to tap phone numbers in Haiku and dial through Doximity in order to disguise your true number and replace with your practice or entity phone number.
Questions about Doximity?
See the Doximity Dialer Support site for more information. Otherwise, you can email dialervip@doximity.com or call 650-870-2727 with your question. Phone support is available Monday through Friday, 9 am - 8 pm ET.
Troubleshooting with patients
Instruct patients to do the following to get visits back on track after technical difficulties:
Connectivity issues
- Switch from WiFi to cellular network or hotspot, if able
- Restart internet router + modem
You can’t hear patient
- Ensure not muted
- Check that the correct microphone is selected for use in BlueJeans settings
You can’t see patient
- Ensure camera is turned on
- Check that the correct camera is selected for use in BlueJeans settings
Other issues
- Hang up on all active phone calls and close all other applications
- Leave visit, restart device, then rejoin the visit
- Update internet browser (if not using BlueJeans app)
- Connect with a different device (can use Switchboard messaging services to send visit link to a different email or phone number)
Link to patient-facing instructions
Patient-facing instructions for telemedicine are linked in every message a patient receives before their telehealth visit, and can be found here.
Patient is struggling to find link or join visit
You may encounter instances where your patient cannot access the BlueJeans link they were sent in advance of their visit OR you and the patient may be in different rooms.
These issues can almost always be resolved by manually sending the patient their virual visit link through Switchboard's "Join Now" message. This message includes the meeting link and can be sent instantly to the patient via email and text message.
To use this function:
1. Click the "Send and view pt messages" button in Switchboard under the appropriate appointment.
2. Select the "Join Now" message template. If needed, you can customize the message.
3. When ready, select the "Send" button.
